QuickBooks checks printing problems can interrupt your accounting work when checks or paychecks fail to print, appear misaligned, come out blank, or get stuck in the print queue. The cause may be a printer setting, QuickBooks configuration, browser or PDF issue, driver problem, or Windows printing service.
Before recreating a transaction, identify where the problem occurs. If the preview looks correct but nothing prints, check your printer and computer settings. If the preview is blank or won’t open, the issue may be with QuickBooks, your browser, or PDF settings. In this guide, you’ll learn how to troubleshoot QuickBooks checks printing problems in QuickBooks Desktop and Online, including printer setup, alignment, payroll checks, and common printing errors.
What Usually Causes QuickBooks Checks Printing Problems?
QuickBooks printing failures do not always originate inside QuickBooks. Several components work together to produce a printed check, so a problem with any one of them can interrupt the process.
| Problem | Likely Cause | First Thing to Check |
| Nothing prints | Printer or connection issue | Print a test page from the computer |
| Preview does not open | Browser/PDF issue | Check Adobe Reader and browser settings |
| Check is misaligned | Print scale or check setup | Run a sample alignment |
| Wrong printer appears | Printer configuration | Select the correct printer |
| Checks print in reverse order | Printer page-order setting | Check page-order preferences |
| Check is missing from queue | Print Later/queue settings | Review the print queue |
| Payroll check will not print | Payroll printing preference | Review paycheck print settings |
| Text looks unclear | Printer/PDF quality | Check print quality and PDF output |
| Tax form will not print | PDF/browser issue | Check PDF reader and pop-up settings |
Intuit’s current troubleshooting guidance identifies printer, browser, software, and alignment problems among the common causes of printing issues involving paychecks, pay stubs, and forms. Before changing several QuickBooks settings at once, determine whether the problem occurs with only QuickBooks or with other applications too.
Start With These Basic Printer Checks Before Changing QuickBooks Settings
A few basic checks can eliminate printer-related problems quickly.
1. Test the printer: Print a test document from another application. If the printer cannot print a normal document, QuickBooks is unlikely to be the root cause.
- The printer is powered on.
- The correct printer is selected.
- Paper is loaded properly.
- The printer is not paused or offline.
- The printer has no paper-jam or cartridge warning.
- Your computer can communicate with the printer.
- The printer driver is installed correctly.
If you have multiple printers, make sure the intended printer is selected as the default printer. This is also one of Intuit’s recommended checks for printing problems.
2. Restart the printing environment: If the printer previously worked but suddenly stopped, restart:
- QuickBooks.
- Your computer.
- The printer.
For network printers, also verify that the computer and printer are connected to the same network when required.
3. Check the paper:
Checks are not the same as ordinary documents. The check stock must match the format selected in QuickBooks. Using the wrong check style or paper orientation can result in information appearing in the wrong location even though the printer itself is working correctly.
How to Fix QuickBooks Desktop Checks Printing Problems
QuickBooks Desktop relies on Windows printer configuration, printer drivers, and its own form-printing settings. A problem with any of these components can affect checks and other forms. Work through the following solutions in order rather than changing several settings at once.
1. Run the Print and PDF Repair Tool
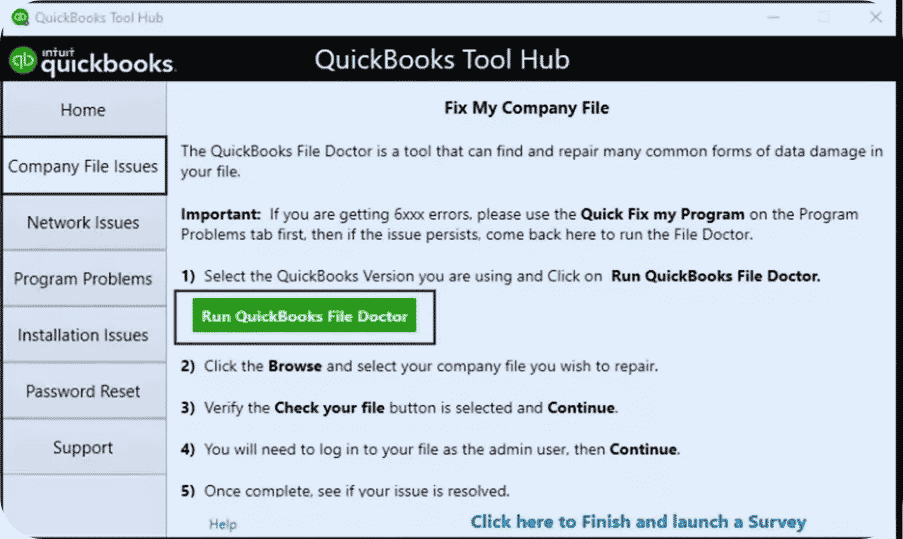
QuickBooks Tool Hub includes the Print and PDF Repair Tool, which can help diagnose certain printing and PDF-related problems in QuickBooks Desktop.
- Close QuickBooks Desktop.
- Open QuickBooks Tool Hub on your computer.
- Select Program Problems.
- Choose QuickBooks Print & PDF Repair Tool.
- Allow the tool to complete its process.
- Reopen QuickBooks Desktop.
- Try printing the check again.
If you do not already have QuickBooks Tool Hub installed, obtain it from Intuit rather than downloading an unofficial copy. This is a useful first step when QuickBooks has difficulty generating or processing a print job, particularly when the issue also affects PDF creation.
2. Rebuild the QuickBooks Print Configuration
QuickBooks Desktop stores printer configuration information in the QBPrint.QBP file. If this file becomes damaged, printing can behave unexpectedly. Before modifying the file, close QuickBooks Desktop and make sure you are working with the correct company and program installation. A common troubleshooting approach is:
- Close QuickBooks Desktop.
- Open the folder containing the QuickBooks print configuration file.
- Locate QBPrint.QBP.
- Rename the file to something such as QBPrint.OLD rather than deleting it.
- Open QuickBooks Desktop again.
- Go to File > Printer Setup.
- Select Check/Paycheck.
- Review the printer configuration and save it.
QuickBooks can create a new print configuration file after the old one is renamed. If you are unsure which folder contains the file for your QuickBooks version, do not delete files from the installation directory at random.
3. Check Your Printer and Driver
Sometimes the cause has nothing to do with QuickBooks.
- The printer is powered on.
- The printer is not offline or paused.
- The correct printer is selected.
- Paper is loaded correctly.
- There are no paper-jam or hardware warnings.
- Your computer recognizes the printer.
- The printer driver is installed correctly.
Then print a test page from Windows or another basic application. If the test page fails too, focus on the printer, connection, Windows configuration, or driver. Updating the printer driver from the printer manufacturer’s official source may help when the existing driver is outdated or damaged.
4. Align Checks Correctly
If checks print but the information does not line up with the check stock, you likely have an alignment or print-formatting problem. In QuickBooks Desktop:
- Go to File.
- Select Printer Setup.
- Choose Check/Paycheck.
- Review the available alignment or positioning options.
- Print a sample on plain paper.
- Place the sample over your blank check stock.
- Adjust the positioning as needed.
- Print another sample before using an actual check.
Avoid repeatedly testing with real checks. Plain paper lets you compare the printed information with the check stock without wasting numbered checks. Also verify that the selected check style matches the type of check stock you are using.
5. Restart the Windows Print Spooler
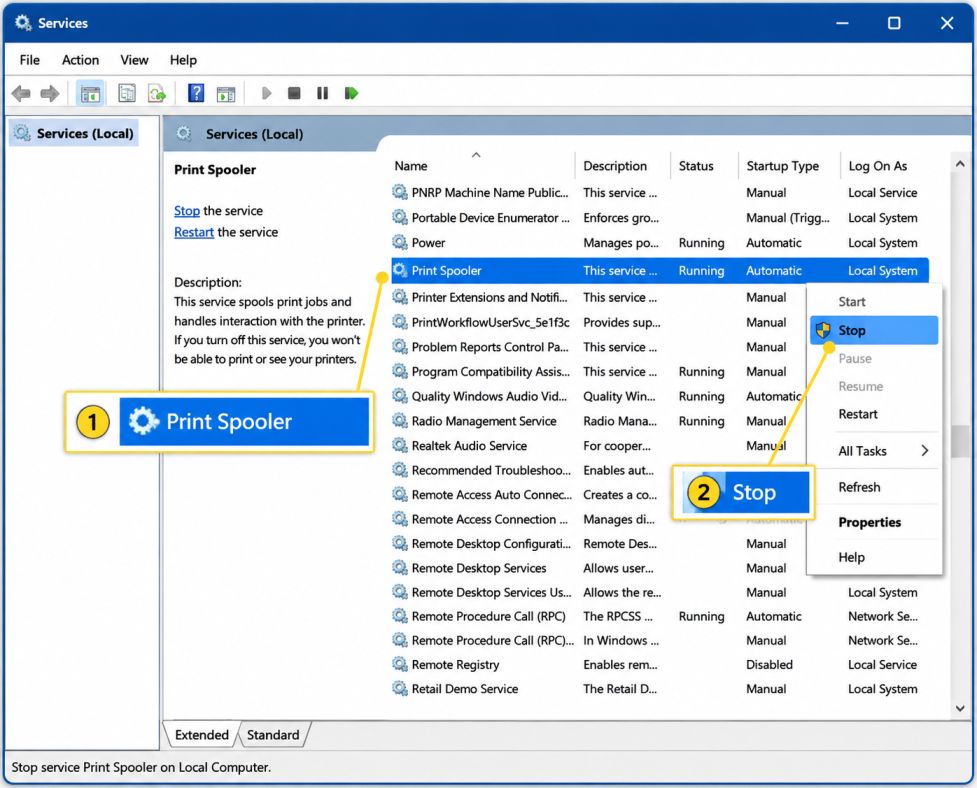
The Windows Print Spooler manages print jobs between applications and printers. If a print job becomes stuck, restarting the service can sometimes clear the problem.
- Press Windows + R.
- Enter services.msc.
- Press Enter.
- Find Print Spooler.
- Right-click the service.
- Select Restart.
If the service is stopped, start it instead. Afterward, test printing from another application and then try QuickBooks again. If print jobs repeatedly become stuck, investigate the printer driver and Windows printer configuration rather than repeatedly restarting the spooler.
How to Fix QuickBooks Online Checks Printing Problems
QuickBooks Online works differently because the application runs through a web browser. As a result, browser behavior, PDF handling, pop-up permissions, and local printer settings can all affect printing.
A. Try a Private or Incognito Window
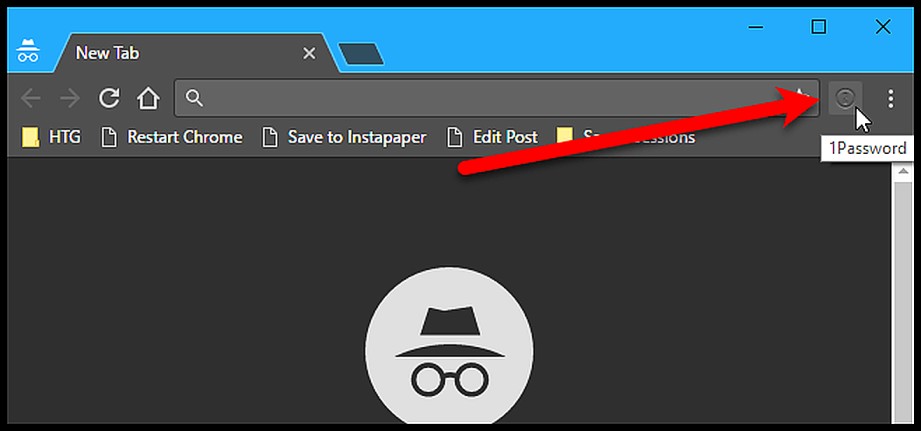
Browser cache and stored site data can sometimes interfere with web-based functions. Try opening QuickBooks Online in a private browsing window:
- Chrome: Ctrl + Shift + N
- Microsoft Edge: Ctrl + Shift + N
- Safari: Command + Shift + N
Sign in and try printing the check again. If printing works normally in the private window, stored browser data or an extension may be contributing to the problem. You can then troubleshoot your regular browser rather than changing QuickBooks accounting data.
B. Check Browser and Print Settings
When a QuickBooks Online check is misaligned, check the browser’s print settings before changing the check itself.
- Paper size.
- Page orientation.
- Scale.
- Margins.
- Printer selection.
- Any automatic “Fit to page” or similar scaling option.
For a check that requires precise positioning, unwanted scaling can shift the printed information away from the intended fields. If the browser preview looks different from the QuickBooks preview, compare the two before printing.
C. Check PDF Printing
Some QuickBooks Online documents are generated through a PDF workflow. If the preview does not open correctly or the document looks different after downloading, the PDF viewer or browser may be involved. Try saving the document as a PDF and opening it with a reliable PDF application such as Adobe Acrobat Reader. Then review the application’s print settings before printing. Pay particular attention to scaling. An option such as Actual Size may be appropriate when the document requires fixed positioning, while automatic scaling can change the output dimensions.
D. Use QuickBooks Online’s Check Print Setup
If the printer works correctly but the check information is consistently misplaced, review QuickBooks Online’s check-printing setup. Use the check printing setup and alignment process to:
- Select the appropriate check format.
- Print a sample on plain paper.
- Compare it with your check stock.
- Adjust the alignment.
- Print another sample.
- Repeat until the information is positioned correctly.
Make sure you use the correct check stock for the selected format. Changing browser settings will not correct an incorrect check format.
What to Do When a QuickBooks Check Prints Incorrectly
Do not immediately void or recreate a check simply because the physical printout is wrong. First determine what actually happened.
- If the check is blank: Check the preview first. If the preview itself is blank, investigate the browser, PDF, or QuickBooks printing process. If the preview contains the correct information but the physical page is blank, investigate the printer, ink or toner, paper, and driver.
- If the check is cut off:
- Paper size.
- Printer margins.
- Check style.
- Alignment settings.
- If information is shifted: Run another alignment test before changing the transaction itself.
- If the wrong check number printed: Stop and verify the transaction and starting check number before printing additional checks. QuickBooks Online’s current check-printing workflow specifically requires reviewing the starting check number before printing a batch.
How to Reprint a QuickBooks Check
If a check was damaged, printed incorrectly, or you need another copy for your records, you can reprint the existing transaction instead of creating a new one. Follow the steps below carefully to avoid duplicate checks or accounting errors.
- Open QuickBooks Online: Sign in to your QuickBooks Online account and open the company where the check was created. Make sure you are working in the correct company file before continuing.
- Open the Check Detail Report: Go to Reports and search for Check Detail. This report helps you locate the original check and review its transaction information.
- Find the Check: Search for the check using details such as the date, payee, amount, or check number. Select the correct transaction before proceeding with the reprint.
- Review the Check: Open the check and verify the payee, amount, date, and check number. Confirming these details helps prevent you from accidentally reprinting the wrong transaction.
- Select Print: Choose the available Print option from the check transaction. QuickBooks will prepare the check for printing.
- Review the Print Preview: Check the preview before sending the document to your printer. Make sure the check information appears correctly and is positioned properly.
- Check Printer Settings: Select the correct printer and verify the paper size, orientation, and scaling settings. Use the appropriate check stock for your selected check format.
- Print the Check: Send the check to the printer and wait for the print job to complete. Avoid creating another check simply because the printer takes a few moments to respond.
- Verify the Printed Check: Compare the printed check with the transaction in QuickBooks. Confirm that the check number, payee, amount, and other important details are correct.
- Before You Reprint: Always confirm that the original check was not successfully printed or issued. If the original check was lost, stolen, or already given to the payee, review its status and your company’s check-handling procedures before printing another one.
QuickBooks Online Printing Problems Can Be Browser-Related
Because QuickBooks Online runs in a browser, printing involves more than the accounting software itself. A browser may interfere with printing when:
- A pop-up is blocked.
- The PDF preview does not load.
- The PDF downloads instead of opening.
- The printer icon is missing.
- Browser settings prevent required content from opening.
- Adobe Reader is unavailable or improperly configured.
Intuit’s current QuickBooks Online printing guidance specifically covers blank previews, PDF behavior, missing printer controls, and other browser-related printing failures.
- Check pop-up settings: If selecting Print produces no visible result, check whether your browser is blocking the window or PDF that QuickBooks is attempting to open.
- Check Adobe Reader: Intuit recommends installing or updating Adobe Acrobat Reader when printing paychecks, pay stubs, or forms requires PDF output.
QuickBooks Printer Setup Won’t Open or Is Not Working
If the QuickBooks Printer Setup is not opening or does not respond, the problem may be related to QuickBooks, your browser, PDF settings, or the Windows printer configuration. Start with a few simple checks before changing advanced settings.
- Refresh QuickBooks Online: If you are using QuickBooks Online, refresh the page and sign in again if necessary. A temporary browser or session issue may prevent the printer setup or print window from loading correctly.
- Close Unnecessary Browser Tabs: Close extra browser tabs and windows before trying again. This can reduce browser conflicts and make it easier for the QuickBooks printing window or PDF preview to open properly.
- Check Pop-Up Permissions: Your browser may be blocking the window QuickBooks needs for printing. Check the browser’s site permissions and allow pop-ups for QuickBooks Online before trying to open the print setup again.
- Check Adobe Acrobat Reader: Make sure Adobe Acrobat Reader is installed and opens PDF files correctly on your computer. If QuickBooks generates a PDF but the preview or print process does not work, an issue with PDF handling may be involved.
- Review Browser PDF Settings: Check how your browser handles PDF files, especially if documents download automatically instead of opening in a preview. Correcting the PDF behavior can help when QuickBooks printing options fail to appear.
- Try Printing Again: After checking the browser and PDF settings, return to QuickBooks and try opening the printer setup or printing the check again. If the setup opens normally, test it with plain paper before using actual check stock.
- Test the Printer Outside QuickBooks: Print a normal document from another application on your computer. If the printer does not work there either, troubleshoot the printer, connection, or Windows settings before focusing on QuickBooks.
- Check QuickBooks Desktop Printer Settings: If you use QuickBooks Desktop, review File > Printer Setup and confirm that the correct printer is selected for checks or paychecks. Also check the Windows printer settings to make sure the printer is installed, online, and available to QuickBooks.
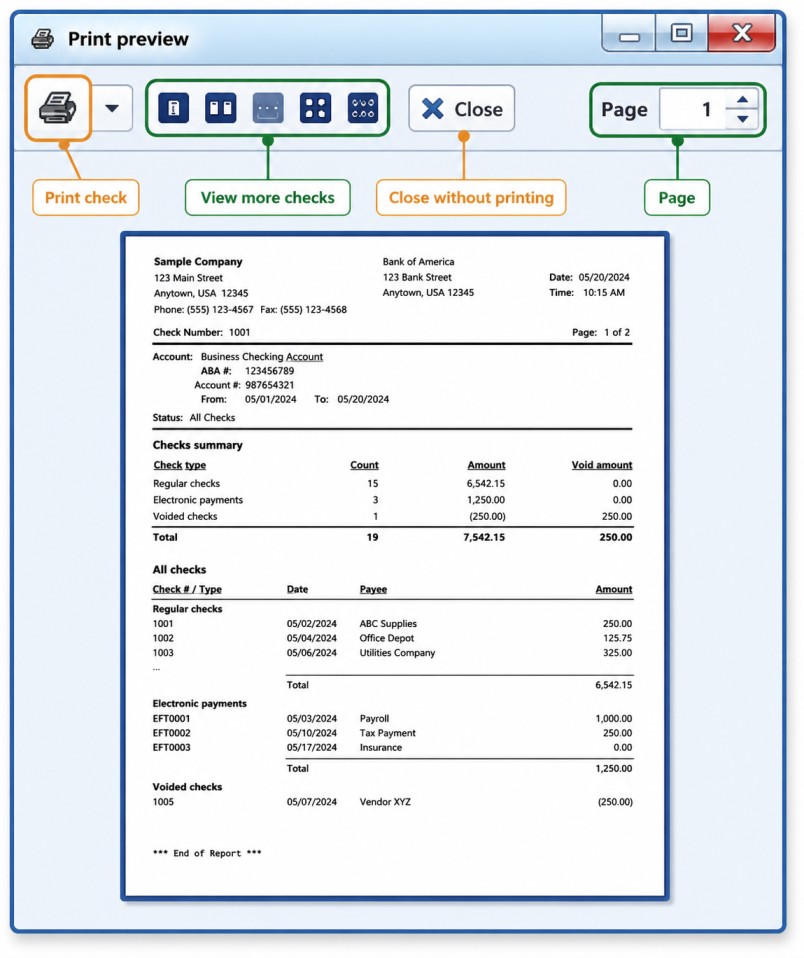
What to Do When QuickBooks Won’t Connect to Your Printer
When QuickBooks won’t connect to your printer, first find out whether the problem is with QuickBooks or the printer itself. This simple check can save you from changing QuickBooks settings when the actual issue is with Windows, the printer connection, or the printer driver.
- Test the Printer Outside QuickBooks: Open another application, such as Notepad, and print a simple document. If the printer also fails there, focus on the printer, connection, Windows settings, or driver rather than QuickBooks.
- Check the Selected Printer; If other applications print normally but QuickBooks does not, check which printer QuickBooks is using. This is especially important when several printers are installed on the same computer, as QuickBooks may be sending the job to a different device.
- Check QuickBooks Online Settings: For QuickBooks Online, review your browser and PDF settings if the printer is working normally but QuickBooks cannot send the document to it. A blocked pop-up, PDF preview problem, or browser issue can interrupt the printing process.
- Check QuickBooks Desktop Settings: For QuickBooks Desktop, open the printer setup and confirm that the correct printer is selected for checks or paychecks. Also verify that Windows recognizes the printer and shows it as available.
- Test Again: After making the necessary change, print a sample document or check on plain paper first. This confirms that the connection is working before you use actual check stock.
How to Prevent Future QuickBooks Check Printing Issues
Once you have resolved a QuickBooks check printing issue, a few simple habits can help keep your printing process reliable. Taking these precautions also reduces the risk of wasting check stock or accidentally creating duplicate transactions.
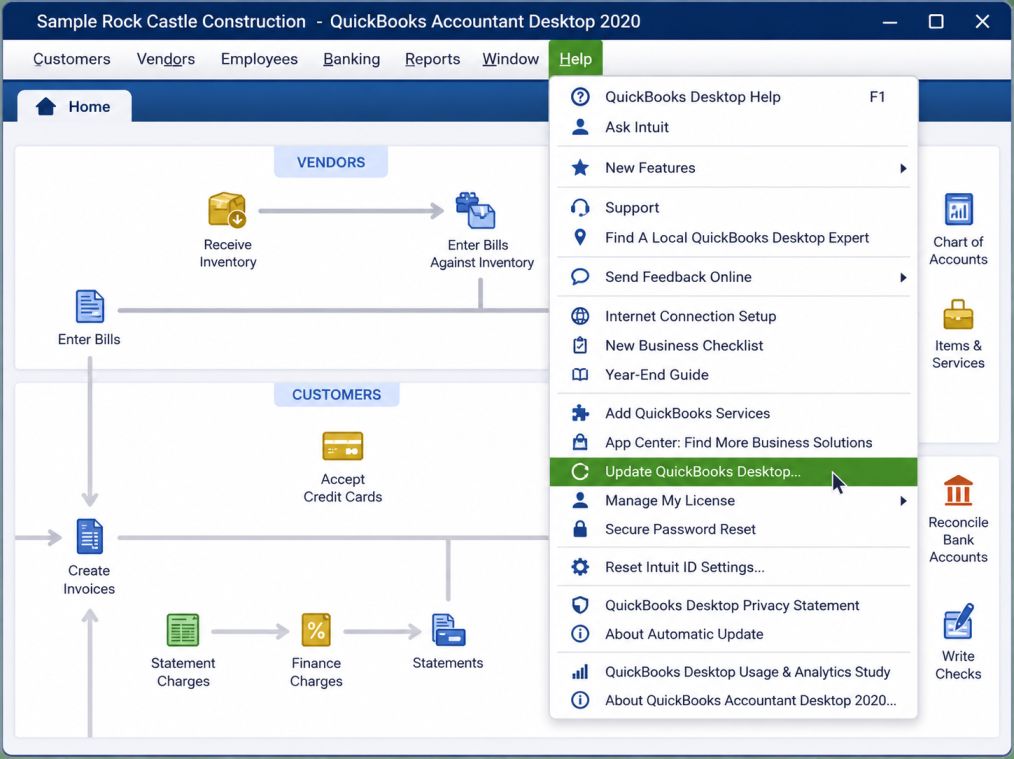
- Keep QuickBooks Updated: For QuickBooks Desktop, install available updates through the normal QuickBooks update process. Keeping the software current can help maintain compatibility with supported Windows components and printing functions.
- Keep Printer Drivers Updated: Check for printer-driver updates from your printer manufacturer when necessary. An outdated or damaged driver can cause printing failures, incorrect formatting, or communication problems between QuickBooks and the printer.
- Use the Correct Check Stock: Always use check stock that matches the check format selected in QuickBooks. Using the wrong format can cause information to appear in the wrong position even when the printer itself is working correctly.
- Test Alignment on Plain Paper: Before printing a batch of checks, print a sample on plain paper and compare it with the actual check stock. This lets you correct alignment problems without wasting numbered checks.
- Maintain Your Printer: Keep the printer clean, properly supplied with paper, and free from paper-feed problems. Regular maintenance can prevent printing interruptions that may appear to be QuickBooks-related.
- Avoid Unnecessary Printer Changes: Once your printer and QuickBooks settings are working correctly, avoid changing them without a specific reason. Unnecessary changes to paper size, scaling, orientation, or printer preferences can create new alignment or printing problems.
- Review the Print Preview: Before printing several checks at once, review the preview carefully. Make sure the payee, amount, check number, and layout appear correct before sending the entire batch to the printer.
- Verify Check Numbers: Always confirm the starting and individual check numbers before printing. This is especially important when printing multiple checks because an incorrect number can create confusion in your physical check records.
- Keep Browser and PDF Software Current: If you use QuickBooks Online, keep your supported browser and PDF software reasonably current. Also review browser permissions if pop-ups or PDF previews are required for the printing process.
- Confirm the Transaction Before Reprinting: A failed print job does not necessarily mean the QuickBooks transaction failed. Before creating another check or payment, verify the original transaction and determine whether the check was actually printed or recorded.
Taking a moment to confirm the transaction status can help you avoid duplicate checks and unnecessary accounting corrections.
Conclusion
QuickBooks checks printing problems can be caused by something as simple as the wrong printer or paper setting, but they can also involve printer drivers, Windows services, QuickBooks Desktop configuration, browser behavior, PDF handling, or check alignment.
The most reliable approach is to isolate the problem first. Test the printer outside QuickBooks, check the preview, verify the selected printer and paper, and then work through the settings specific to QuickBooks Desktop or QuickBooks Online. When checks are misaligned, use sample pages instead of wasting actual check stock. When a print job fails, verify the transaction status before creating another check. With a methodical approach, you can usually identify the source of the printing problem without disrupting your accounting records.
Frequently Asked Questions
To ensure checks print correctly in QuickBooks Desktop:
1. Open QuickBooks Desktop and go to File > Printer Setup.
2. In the Form Name dropdown, choose Check/Paycheck.
3. Click Align to adjust horizontal and vertical positioning.
4. Print a test page on plain paper.
5. Continue adjusting until the printed check aligns on your check stock.
6. Load your actual check paper and print.
For QuickBooks Online, settings are managed through your browser:
1. Open the check you want to print in QuickBooks Online.
2. Click Print (or press Ctrl+P / Cmd+P).
3. In the browser print dialog, set Margins to None.
4. Ensure Scale is 100% (not “Fit to page”).
5. Set Paper size to Letter.
6. If using Chrome/Edge, try Incognito/Private mode if alignment is off.
7. Print a test on blank paper, adjust if needed.
QuickBooks has a built‑in tool for common printing/PDF errors:
1. Close QuickBooks Desktop.
2. Download and install the QuickBooks Tool Hub.
3. Open the Tool Hub and select Program Problems.
4. Run the QuickBooks PDF & Print Repair Tool.
5. After it finishes, open QuickBooks and try printing again.
6. If that doesn’t work, try restarting your computer and resetting temp folder permissions.
If printing on preprinted check stock is off:
1. Go to File > Printer Setup.
2. Select Check/Paycheck for the form type.
3. Click Align and adjust until the text aligns with your check fields.
4. Save and print a sample on plain paper before using actual check stock.
5. If alignment still fails, check printer drivers and update them.
Missing margins or clipped edges can happen when remote printers don’t send the correct page size:
1. Close QuickBooks.
2. Make sure your remote or local printer driver supports the check stock size.
3. In QuickBooks Printer Setup, choose Check/Paycheck and click Align.
4. Adjust the vertical alignment so edges print fully.
5. Reconnect the remote printer and print a test page.
6. If issues persist, install updated remote printer drivers.
Signature lines can disappear if printer settings don’t synchronize between users:
1. Ensure all users have the same printer selected in QuickBooks.
2. Have one user set up Printer Setup for checks.
3. Save and close QuickBooks.
4. Other users should restart QuickBooks and try printing.
5. If still missing, clear Temp files and confirm that printer drivers are identical on all machines.
(Tip: mismatched settings often cause disappearing fields.)
HP printers can sometimes misinterpret QuickBooks print commands:
1. Turn off Fit to Page in the HP print dialog.
2. In QuickBooks Desktop, go to File > Printer Setup > Check/Paycheck.
3. Use Align to fine‑tune position.
4. Update the HP printer driver to the latest version from HP’s website.
5. Test print from another application (like Notepad) to confirm the printer works outside QuickBooks.
If QuickBooks Online won’t print properly in Windows:
1. Try printing in Incognito/Private mode to avoid cached settings.
2. Clear your browser’s cache and cookies if normal mode fails.
3. Use a supported browser like Chrome or Edge.
4. In the print window, check that Scale is 100% and Margins are correct.
5. If previews are blank, install or update Adobe Acrobat Reader and print from PDF.
Yes, check printing is supported in QuickBooks Desktop editions that include check-writing and printing features. If the option is missing, verify your QuickBooks edition, company preferences, and the type of transaction you are trying to print.
QuickBooks Desktop Enterprise includes check and paycheck printing features, but some printing options and workflows can differ from Pro and Premier. If a setting or menu is different in Enterprise, check the specific workflow for your Enterprise edition rather than applying Online instructions.
If your QuickBooks Online plan provides the relevant check-printing workflow, multiple checks can be prepared for printing rather than entering each payment again. Review the print queue carefully before processing a batch.
A missing print option does not always indicate a printer problem. The option can depend on the QuickBooks version, subscription or payroll service, transaction type, user permissions, and the workflow being used.
Yes. User roles and permissions can affect what a person can access or modify inside a QuickBooks company. If one user can print checks while another cannot, compare their permissions and access rather than immediately changing printer settings.