
The QuickBooks “Company File Not Found” error appears when QuickBooks Desktop can’t locate or access your company file. You may run into this problem after moving the file, changing its name or location, losing a network connection, or when Windows permissions prevent QuickBooks from accessing the folder. In some cases, the issue can also be related to a damaged company file or problems with the network setup.
Before you start troubleshooting, first confirm that the company file still exists and that you can access its folder. If the file is stored on a network, make sure the host computer is available and the shared location can be reached. You should also check that QuickBooks has the required permissions to access the file.
Once you’ve confirmed the file location and basic access, you can work through the appropriate troubleshooting steps to identify why QuickBooks can’t find or open the company file.
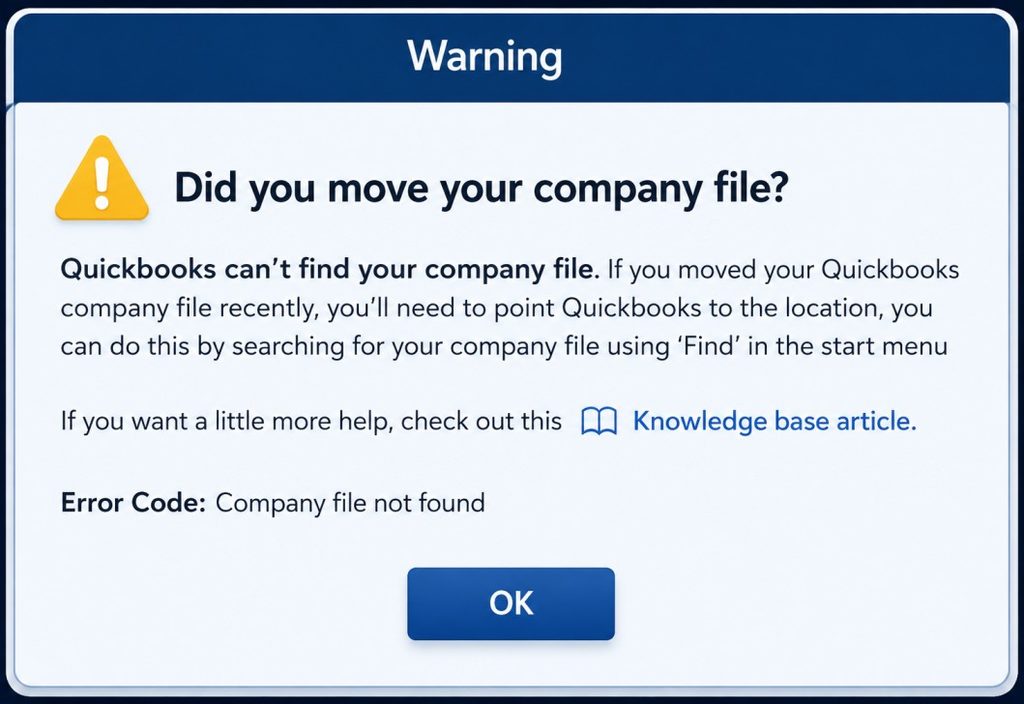
What Are the Reasons a QuickBooks Company File Won’t Open?
If your QuickBooks company file won’t open, the problem can come from the file location, QuickBooks version, data damage, or network access. Check these common causes before trying advanced repairs.
1. The Company File Was Moved or Renamed: If you recently moved or renamed the file, QuickBooks may still be looking in the old location. Check your usual company-file folder and confirm the file is still there.
2. The File Type or Extension Is Incorrect: QuickBooks uses different formats for company files, backups, and portable files. Make sure you’re opening the correct file type instead of simply changing its extension.
3. The Company File Is Damaged: An unexpected shutdown, hard-drive problem, or abnormal QuickBooks closure can damage the company file. Keep a backup of the original before attempting any repair.
4. The QuickBooks Version Is Too Old: A company file updated in a newer QuickBooks Desktop version may not open in an older version. Check which QuickBooks version was last used with the file.
5. The Company File Was Deleted: If you can’t find the file, check the Recycle Bin, other storage locations, and available QuickBooks backups. Don’t modify the original backup while trying to recover the company file.
6. The Company File Has Data Damage: If QuickBooks previously crashed or showed unusual data errors, the company file may have data damage. You can use Verify Data and, when appropriate, Rebuild Data to check for certain data problems.
7. The File Is Stored on a Network: If the company file is on another computer or server, network problems can stop QuickBooks from accessing it. Check the host computer, shared folder, network connection, and user permissions.
8. A QuickBooks Error Is Appearing: Errors such as H505, 6000-series errors, Error 3371, unrecoverable errors, or C=xxx errors can have different causes. Note the exact error message so you can follow the appropriate troubleshooting steps.
9. The .TLG File Is Involved: The .TLG file is a transaction log file, not the main company file. Don’t delete or rename it as a first step; keep the original QuickBooks files preserved while troubleshooting.
What Should Be Checked Before Fixing the Company File Error?
Before you start fixing the QuickBooks Desktop “Company File Not Found” error, take a few simple precautions. These steps can help you avoid unnecessary changes and make troubleshooting safer.
1. Check Windows Administrator Access: Make sure you’re signed in to Windows with an administrator account. This gives you the required permission to access QuickBooks and its related files.
2. Confirm the Network Connection: If your company file is stored on another computer or server, check that the network connection is stable. A weak connection can prevent QuickBooks from finding the file.
3. Check Network Discover: If you’re using QuickBooks in multi-user mode, make sure the computers can communicate over the network. Network discovery should be enabled where required for your setup.
4. Close Running QuickBooks Processes: Close QuickBooks on all computers before troubleshooting the company file. If QuickBooks is still running in the background, use Task Manager to close unnecessary QuickBooks processes.
5. Update QuickBooks Desktop: Check that your QuickBooks Desktop installation is fully updated. Using an outdated version can sometimes cause compatibility and company-file access problems.
6. Check Firewall and Antivirus Settings: Make sure your firewall or antivirus isn’t blocking QuickBooks or its network components. Instead of turning security off completely, check whether QuickBooks has been blocked.
7. Confirm the Company File Location: Before repairing anything, make sure the .QBW company file still exists where you expect it to be. If the file was moved or renamed, QuickBooks may simply be looking in the wrong location.
8. Create a Backup Before Making Changes: If you can still access the company file, create a current backup before troubleshooting. Keeping an original copy gives you a safer recovery option if something goes wrong.
What Should You Try First?
You don’t need to try every solution at once. A practical order is:
- Check that you’re opening the correct .qbw file.
- Move a copy of the file to a local folder.
- Run QuickBooks as administrator.
- Rename the .ND and .TLG files.
- Open a sample company file.
- Check multi-user hosting if the file is on a network.
- Run Quick Fix my File and QuickBooks File Doctor.
- Update QuickBooks Desktop.
If none of these steps work and the company file contains important accounting data, don’t keep modifying the original file. Work from a backup or contact QuickBooks support for further data-recovery options. Intuit also recommends professional data-recovery assistance when standard repair tools cannot resolve confirmed data damage.
QuickBooks Company File Not Found?: 11 Solutions to Fix Fast
Solution 1: Move the Company File to a Local Folder
If QuickBooks can’t find or open your company file, first make sure the file is stored somewhere you can easily access. Moving a company file to a local folder can help rule out problems caused by network drives, disconnected storage, or incorrect file paths.
Follow these steps:
- Open File Explorer and use the search box to look for your company file.
- Search using the file extension you need:
- *.qbw — QuickBooks company files
- *.qbb — QuickBooks backup files
- *.qbx — Accountant’s Copy files
- *.qby — Accountant’s Copy import files
- *.qba — Accountant’s Copy files
- When you find the file, right-click it and select Open file location.
- Right-click the file again and choose Copy. Keep the original file untouched while troubleshooting.
- Paste the copy into a local QuickBooks company-file folder, such as:
C:\Users\Public\Public Documents\Intuit\QuickBooks20XX\Company Files - Open QuickBooks and select the copied company file from its new location.
Important: Replace 20XX with the QuickBooks Desktop version installed on the computer. If the company file is normally stored on a server or shared network folder, don’t move the live file permanently without first considering your multi-user setup.
Once the copied file opens successfully, you can continue troubleshooting the original location. Keeping the original file unchanged also gives you a safer backup while you work on the problem.
Solution 2: Ping the Server to Check the Network Connection
If your QuickBooks company file is stored on a server, a network problem can stop QuickBooks from opening or connecting to it. Before you change anything in QuickBooks, you can run a quick ping test to see whether your computer can communicate with the server.
A. Turn On Network Discovery and File Sharing
First, make sure your computer can discover other devices on the network.
- Open Settings in Windows.
- Search for Advanced sharing settings and open it.
- Expand the network profile you’re currently using.
- Turn on Network Discovery.
- Turn on File and Printer Sharing.
If these options are already enabled, you can move on to the ping test.
B. Run a Ping Test to the QuickBooks Server
Now you can check whether your computer can reach the server:
- Press Windows + R to open the Run window.
- Type cmd and press Enter.
- In Command Prompt, enter ipconfig /all and press Enter.
- Find the server name or use the server name provided by your network administrator.
- Run the following command, replacing SERVER123 with the actual server name: ping SERVER123
- Press Enter and check the response.
If you receive replies with 0% packet loss, your computer is communicating with the server at a basic network level. If you see Request timed out or packet loss, there may be a network connectivity problem that needs to be addressed.
Keep in mind that a successful ping doesn’t guarantee that QuickBooks can access the company-file folder. If the ping works but QuickBooks still won’t open the company file, check the shared-folder permissions, hosting configuration, and company-file path next.
Solution 3: Open the Company File Using the Right Method
QuickBooks uses different file types for company data, backups, and Accountant’s Copies. If you try to open one file type using the wrong option, QuickBooks may show an error or fail to recognize the file. Before you continue, check the file extension and then use the appropriate option.
A. Open QuickBooks Backup File (.QBB)
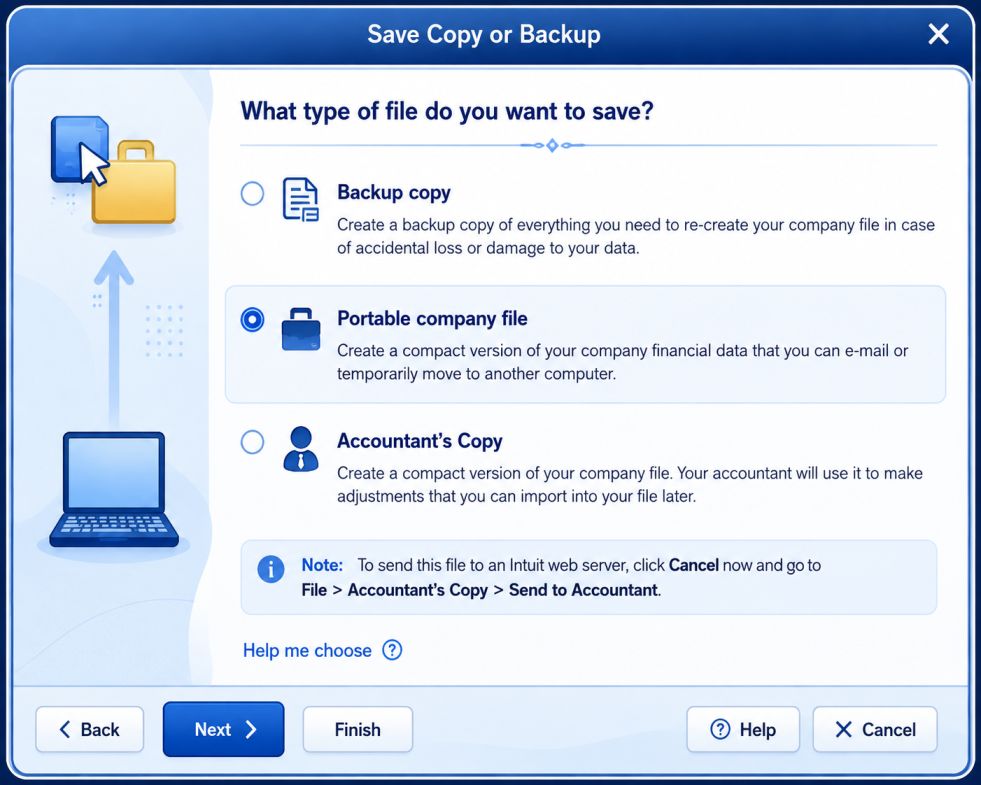
A .QBB file is a backup copy, so you need to restore it rather than open it like a regular company file.
- Open QuickBooks Desktop.
- Go to File > Open or Restore Company.
- Select Restore a Backup Copy and click Next.
- Choose the .QBB backup file and click Open.
- Follow the on-screen instructions to choose where the restored company file should be saved.
B. Open QuickBooks Company File (.QBW)
If you already have the working company file, look for the .QBW extension.
- Open QuickBooks Desktop.
- Select File > Open or Restore Company.
- Choose Open a Company File and click Next.
- Browse to the location of your .QBW file.
- Select the file and click Open.
If QuickBooks opens the file successfully, you can continue working with the company data normally.
C. Open an Accountant’s Copy Transfer File (.QBX)
A .QBX file is an Accountant’s Copy transfer file, so it shouldn’t be opened as a normal .QBW company file.
- Open QuickBooks Desktop.
- Go to File > Open or Restore Company.
- Select Convert an Accountant’s Copy Transfer File.
- Click Next.
- Locate and select the .QBX file.
- Follow the prompts to save the converted company file.
Important: Don’t simply rename a .QBB or .QBX file to .QBW. Changing the file extension doesn’t convert the file into a working company file.
Solution 4: Fix Database Server Manager Issues in Multi-User Mode
If your QuickBooks company file won’t open in multi-user mode, the problem may be related to the QuickBooks Database Server Manager (DBSM), hosting settings, or damaged .ND and .TLG files. You can work through the steps below to refresh the network configuration and check whether the server is properly set up.
Step 1: Rename the .ND and .TLG Files
QuickBooks creates .ND (Network Data) and .TLG (Transaction Log) files alongside the company file. If these files become damaged, QuickBooks may have trouble connecting to the company file over the network.
- Close QuickBooks on all computers that access the company file.
- Open File Explorer and go to the folder containing your company file.
- Look for files with .ND and .TLG extensions, such as:
- YourCompanyFile.qbw.nd
- YourCompanyFile.qbw.tlg
- Right-click each file and select Rename.
- Add .old to the end of each filename. For example:
- YourCompanyFile.qbw.nd.old
- YourCompanyFile.qbw.tlg.old
- Don’t delete the original files. Renaming them allows QuickBooks to create new versions when needed.
- Open QuickBooks Database Server Manager on the server.
- Select the Scan Folders tab.
- Use Browse to select the folder where your company file is stored.
- Select Start Scan and wait for the scan to finish.
After the scan, try opening the company file again in QuickBooks.
Step 2: Check QuickBooks Hosting Settings
In a multi-user environment, hosting should be enabled on the computer acting as the server and not on individual workstations.
On each computer:
- Open QuickBooks Desktop.
- Go to File > Utilities.
- If you see Stop Hosting Multi-User Access, hosting is currently enabled on that computer.
- On workstations where hosting shouldn’t be enabled, select Stop Hosting Multi-User Access.
- Restart the computers after making the changes.
- On the server computer, open QuickBooks and check the hosting setting again.
- Make sure the server is configured to host the company file.
If multiple computers are incorrectly configured to host the same company file, QuickBooks may have trouble establishing the correct multi-user connection. After correcting the settings, try opening the company file from a workstation in Multi-User Mode.
Solution 5: Open a Sample Company File to Find the Problem
If QuickBooks won’t open your company file, try opening a sample company file first. This simple test helps you figure out whether the problem is with QuickBooks itself or with your specific company file.
A. Try Opening Your Company File Without Automatically Loading It
- Open QuickBooks and wait for the No Company Open window.
- Select your company file.
- Press and hold the Alt key, then select Open.
- Keep holding Alt until QuickBooks displays the login window.
- Enter your credentials when prompted.
- Continue holding Alt until the company file opens.
If QuickBooks still won’t open the file, move on to the sample-file test.
B. Open a Sample Company File
- Close QuickBooks.
- Press and hold the Ctrl key on your keyboard.
- While holding Ctrl, double-click the QuickBooks Desktop icon to open the program.
- Keep holding Ctrl until the No Company Open window appears.
- Select Open a sample file.
- Choose one of the available sample company files and try opening it.
If the sample company file opens normally, QuickBooks itself is likely working, and the problem may be specific to your company file. At that point, check the company file’s location, permissions, or data integrity before attempting a repair. If even the sample file won’t open, the problem may be related to QuickBooks Desktop or the Windows environment rather than your company file.
Solution 6: Turn Off the “Save When Closing” Feature
Sometimes QuickBooks tries to reopen the windows that were open during your last session. If one of those windows is causing a problem, QuickBooks may get stuck while loading the company file.
You can turn off this setting and check whether the company file opens normally.
A. Open the Company File Without Restoring Windows
- Start QuickBooks and wait for the No Company Open window.
- Select the company file you want to open.
- Hold down the Alt key and select Open.
- Keep holding Alt until the company file opens. If QuickBooks asks for your sign-in information, enter it and continue holding Alt until the file opens.
B. Turn Off “Save When Closing”
- From the QuickBooks menu, select Edit.
- Choose Preferences.
- Select Desktop View.
- Under My Preferences, select Don’t save the desktop.
- Click OK.
- Close QuickBooks completely.
- Reopen QuickBooks and try opening the company file again.
If the file opens normally after this change, one of the windows QuickBooks was trying to restore may have been causing the loading problem. You can keep the setting disabled or turn it back on later if needed.
Solution 7: Move the Company File and Check Folder Permissions
If QuickBooks can see your company file but won’t open it, the problem may be with the file path or your Windows folder permissions. Moving a copy of the file to a simple local folder can help you determine whether the original location is causing the problem.
A. Move a Copy of the Company File to a New Folder
- Open File Explorer and locate your .QBW company file.
- Right-click the file and select Copy. Keep the original file in its current location.
- Paste the copy into a simple local folder, such as your Desktop.
- Open QuickBooks Desktop.
- Go to File > Open or Restore Company.
- Select Open a company file and choose the copied .QBW file from the Desktop.
- Try opening the company file.
If the copied file opens normally, the original folder or network location may be causing the problem. If it still won’t open, the issue may be with the company file itself or the QuickBooks version being used.
B. Check the Folder Permissions
If you need to access the file from its original folder, make sure your Windows account has the necessary permissions.
- Right-click the folder containing the company file.
- Select Properties.
- Open the Security tab.
- Select your Windows user account.
- Check the permissions available for your account.
- If your account doesn’t have the required access, ask the Windows or network administrator to update the folder permissions.
Important: Don’t change permissions or give Full Control to every user just to make QuickBooks work. The correct permissions depend on whether the company file is stored locally or on a network and whether QuickBooks is being used in multi-user mode. Keep the original file unchanged while troubleshooting.
Solution 8: Repair the Company File with QuickBooks Tool Hub
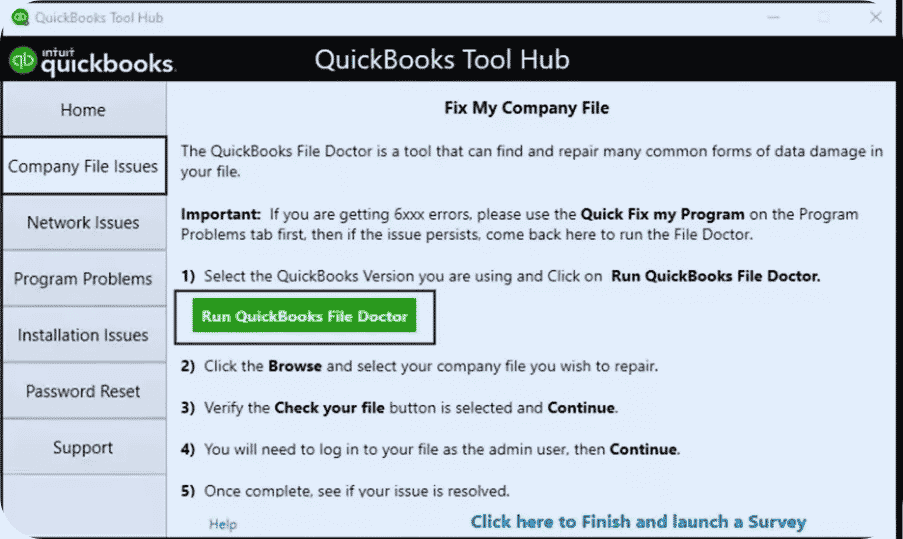
If your company file is damaged, QuickBooks may refuse to open it or show data-related errors. QuickBooks Tool Hub includes tools that can help diagnose and repair certain company-file problems. Before running any repair, create a backup of the company file if you can access one.
Step 1: Download and Install QuickBooks Tool Hub
- Download the latest available version of QuickBooks Tool Hub from Intuit’s official website.
- Open the downloaded installation file, usually named QuickBooksToolHub.exe.
- Follow the on-screen instructions to complete the installation.
- After installation, open QuickBooks Tool Hub.
The Tool Hub version can change over time, so it’s better to use the latest version available from Intuit rather than relying on an older version number.
Step 2: Run Quick Fix My File
- In QuickBooks Tool Hub, select Company File Issues.
- Choose Quick Fix my File.
- Let the tool complete the process.
- Try opening your company file again.
This tool can quickly address certain company-file issues. If QuickBooks still won’t open the file, continue with File Doctor.
Step 3: Run QuickBooks File Doctor
- Open QuickBooks Tool Hub and select Company File Issues.
- Choose Run QuickBooks File Doctor.
- Select your company file from the list or browse to its location.
- Choose the option to Check your file.
- Enter the QuickBooks administrator password when prompted.
- Start the scan and allow it to finish.
The repair time can vary depending on the company file and the problem being checked, so don’t assume the tool has stopped working if the scan takes longer than expected.
Important: File Doctor can help with certain company-file and network-related problems, but it cannot repair every type of data damage. If the company file remains inaccessible after the scan, keep the original file unchanged and consider using a recent backup or a more advanced data-recovery option.
Solution 9: Rename the QuickBooks Company File
If QuickBooks can’t open a company file, the file name or its Windows file attributes may sometimes be part of the problem. Renaming the file with a simple name can help you rule out issues caused by unsupported characters or compression settings.
A. Rename the Company File
- Open File Explorer and go to the folder where your QuickBooks file is saved.
- Find the company file you want to troubleshoot. If you’re working with a backup, look for the file with the .qbb extension.
- Right-click the file and select Rename.
- Give the file a simple name and remove unnecessary special characters such as <, >, %, &, and $.
- Press Enter to save the new name.
Avoid changing the file extension itself. For example, don’t rename .qbb to .qbw just to make QuickBooks recognize it. These are different QuickBooks file types.
B. Check the File Properties
If the file still won’t open, you can check whether Windows has compression or encryption enabled:
- Right-click the renamed file and select Properties.
- On the General tab, select Advanced.
- If Encrypt contents to secure data or Compress contents to save disk space is selected, clear the appropriate option.
- Select OK, then select Apply and OK to save the changes.
C. Try Opening the File Again
Now open QuickBooks Desktop and try accessing the file again.
If you’re working with a .qbb backup file, remember that it needs to be restored before it becomes a working company file. Renaming a backup file doesn’t convert it into a .qbw company file.
Solution 10: Update QuickBooks Desktop to Fix Compatibility Issues
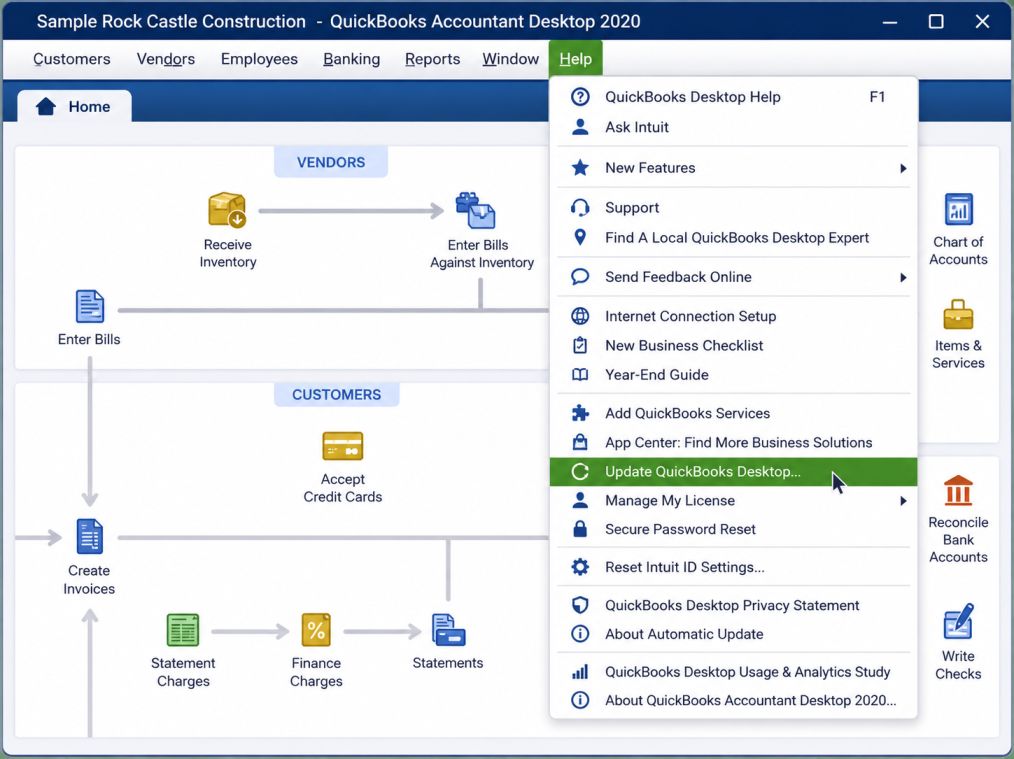
If your QuickBooks company file won’t open, an outdated QuickBooks Desktop version could be part of the problem. Updates can include bug fixes, security improvements, and compatibility changes that may help QuickBooks work properly with your company file.
Before updating, make sure all other users have closed the company file if you’re working in a multi-user environment.
A. Stop Multi-User Hosting Before the Update
- Open QuickBooks Desktop.
- Go to File > Utilities.
- If you see Stop Hosting Multi-User Access, select it.
- If that option isn’t available, don’t change anything and continue with the update.
B. Download and Install the Latest Update
- Go to Help > Update QuickBooks Desktop.
- Open the Update Now tab.
- Select Reset Update if you want QuickBooks to clear the previous update download.
- Select Get Updates and allow the update to finish.
- Close and reopen QuickBooks Desktop.
- If QuickBooks displays an Install Now prompt, select it and follow the on-screen instructions.
- After the update is installed, open your company file again.
If the file still won’t open after updating QuickBooks, don’t keep reinstalling the software. The problem may be related to the company file itself, its location, permissions, or network access.
Solution 11: Run QuickBooks as an Administrator
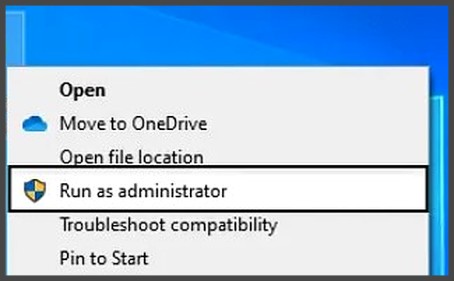
If QuickBooks doesn’t have the required Windows permissions, it may have trouble opening or accessing a company file. Running QuickBooks with administrator privileges can help rule out permission-related problems.
A. Enable Administrator Access for QuickBooks
- Close QuickBooks completely.
- Open the Windows Start menu and search for QuickBooks.
- Right-click the QuickBooks application and select Open file location if needed.
- Right-click the QuickBooks executable and choose Properties.
- Open the Compatibility tab.
- Check Run this program as an administrator.
- Select Apply, then click OK.
- Open QuickBooks again and try to access your company file.
If QuickBooks opens the file successfully after this change, Windows permissions may have been contributing to the problem. However, administrator mode isn’t a universal fix. If the company file is stored on a network, you may also need to check the shared-folder permissions and QuickBooks hosting setup.
How to Identify the QuickBooks Desktop “Company File Not Found” Error?
You may notice a few clear signs when QuickBooks Desktop can’t locate or access your company file. Look for these common symptoms:
- “Company File Not Found” message: QuickBooks may show this message or a similar warning when it can’t locate the selected file.
- Company file won’t open: You may select the correct file, but QuickBooks keeps failing to open it.
- File doesn’t load: The company file may appear in the selection window but won’t actually load after you choose it.
- Works on one computer only: The file may open normally on one system but fail when another computer tries to access it.
- Transactions can’t be saved: If the file connection is interrupted, you may be unable to save new transactions or update existing information.
How to Prevent the QuickBooks Desktop “Company File Not Found” Error?
You can avoid many company-file problems by keeping your QuickBooks setup organized and making regular backups. Follow these simple steps to reduce the chances of losing access to your company file.
1. Keep the Company File in a Reliable Location: Store your company file in a dedicated QuickBooks folder instead of temporary locations such as Downloads. This makes the file easier to find and helps prevent accidental moves or deletions.
2. Avoid Moving or Renaming the File: Don’t move or rename your company file unless there’s a specific reason to do so. If you change its location, QuickBooks may continue looking for the file at its previous path.
3. Set the Correct Folder Permissions: Make sure the required users and QuickBooks components have permission to access the folder. Incorrect Windows permissions can prevent QuickBooks from opening a file that is still available.
4. Configure Hosting Correctly: If you’re using QuickBooks Desktop in multi-user mode, keep the hosting settings properly configured on the computer storing the company file. Avoid changing hosting settings without knowing how they affect other users.
5. Open the Correct Company File: When you have multiple company files or backups, make sure you’re opening the active file rather than an older copy. Check the file location and name before starting your work.
6. Keep QuickBooks and Windows Updated: Install available QuickBooks Desktop and Windows updates to maintain compatibility and reliability. Before a major QuickBooks upgrade, create a current backup of your company file.
7. Use QuickBooks Tool Hub When Needed: If you experience recurring company-file or network problems, use the appropriate QuickBooks Tool Hub utility for the issue. Tool Hub is a troubleshooting resource, not a routine file scanner.
8. Create Regular Company File Backups: Regular backups give you a recovery option if your original file becomes damaged, deleted, or inaccessible. Keep a recent backup available before making major changes to your QuickBooks setup.
9. Keep the File Name Simple: Avoid unnecessary special characters in your company-file name, especially when the file is stored on a network. A simple file name can make file management and troubleshooting easier.
10. Know Where the Original File Is Stored: Keep track of the exact location of your active company file, especially if several copies exist. This helps you avoid opening an outdated backup and wondering why recent transactions are missing.
When Should You Seek Professional Help for a QuickBooks Company File Not Found Error?
If you’ve tried the recommended fixes and QuickBooks still can’t find or open your company file, it may be time to seek professional help. This is especially important if you suspect file corruption, data damage, a locked file, or a failed backup or restore.
Before trying advanced repairs, make a copy of the original company file and keep it safe. Avoid repeatedly modifying or repairing the only copy, especially when the file contains important accounting or payroll data.
How Can a QuickBooks Desktop Company File Be Restored?
If you have a QuickBooks backup company file and need to restore it, you can do it directly from QuickBooks Desktop. Before you begin, keep the original backup file safe and make sure you’re restoring the correct backup.
- Open QuickBooks Desktop and select File.
- Choose Open or Restore Company.
- Select Restore a backup copy, then click Next.
- Choose Local Backup and select Next.
- Browse your computer and locate the QuickBooks backup file, usually with a .QBB extension.
- Select the backup file and click Open.
- Choose where you want to save the restored company file.
- Enter a new file name if needed and select Save.
- Follow the prompts to complete the restoration.
Important: Don’t overwrite the original backup file during the restore process. If QuickBooks asks you to choose a location for the restored company file, save it separately so you still have the original backup available if something goes wrong.
Final Thoughts
The QuickBooks Error Code: Company File Not Found can seem alarming, but it rarely means your data is lost. In most cases, the file was moved, renamed, or temporarily inaccessible due to network issues. By checking your network connection, searching for the file, and opening or restoring it correctly, you can regain access to your company data quickly and safely.
If the file remains missing after following these steps, consider reaching out to an IT expert or QuickBooks professional at 1-888-820-7278 to prevent permanent data loss and ensure your accounting system stays reliable.
Frequently Asked Questions
1. Close QuickBooks on all computers first.
2. Open the Task Manager (Ctrl + Shift + Esc) and end any remaining QuickBooks processes.
3. Restart QuickBooks and go to File → Open or Restore Company.
4. Select your company file and open it.
5. If it still says it’s open, ensure no other user or computer has the file open in multi-user mode.
1. On the server, place the company file in a shared folder accessible to all relevant users.
2. Set folder permissions so each user has at least “Read/Write” access.
3. On the server QuickBooks, go to File → Utilities and select Host Multi-User Access.
4. On each workstation, open QuickBooks and connect to the company file in multi-user mode.
1. Open Windows Search (Windows key + S).
2. Search using the extension wildcard, e.g., *.qbw for company files.
3. Right-click the found file and choose Open file location to see where it’s saved.
4. Note the folder path so you can open the file directly from QuickBooks later.
1. The file may have been moved or renamed — confirm the file’s location using Windows Search.
2. If the file is on a network, check connection by pinging the server.
3. Open QuickBooks and navigate manually to the file via File → Open or Restore Company.
4. If still not found, search for backup files and restore the most recent one.
1. Confirm the company file hasn’t been deleted or moved from its saved location.
2. Use Windows Search such as *.qbw to locate it.
3. Open QuickBooks and choose Open or Restore Company to browse to that location.
4. If it’s on a shared drive, ensure you have the correct network path and permissions.
1. Use the Finder Search and enter *.qbw to find your QuickBooks company file.
2. Check common locations like Documents → QuickBooks or user folders.
3. If you recently moved files, look in the Trash or the last folder you worked in.
4. Once found, open QuickBooks and manually browse to that file.
1. Make sure you are attempting to restore a portable file (.QBM) and not open it normally.
2. In QuickBooks, select File → Open or Restore Company.
3. Choose Restore a portable file and click Next.
4. Browse to your .QBM file, select it, and click Open.
5. Choose where to save the restored file and click Save.
1. Update QuickBooks to the latest release so it can open newer file formats.
2. Run QuickBooks as Administrator by right-clicking the QuickBooks icon and selecting it.
3. Check that the file is not read-only — right-click the file → Properties → uncheck Read-only.
4. Use the QuickBooks Tool Hub and run Quick Fix My File or File Doctor to repair any damage.
1. Confirm the POS data file is in its expected location (often in Documents → POS).
2. Make sure QuickBooks POS is up to date.
3. Check file permissions so your user account has full access.
4. Restart the system and reopen POS as Administrator if necessary.
5. If needed, restore your POS data from the most recent backup.
1. Close QuickBooks and open the QuickBooks Tool Hub.
2. Go to Company File Issues.
3. First run Quick Fix My File.
4. If issues persist, run File Doctor — choose your company file and let it scan and repair.
5. After repair, reopen QuickBooks and your file to confirm the problem is fixed.