When you are unable to send invoices in QuickBooks, the problem can quickly become a business problem. A customer may be waiting for an invoice, a payment may be delayed, or your billing team may have to stop and troubleshoot instead of moving on to other work.
The good news is that invoice-sending problems are usually easier to diagnose when you first identify where the process is failing. An incorrect customer email address, an undelivered message, a browser issue, an email authorization problem, or a QuickBooks Desktop configuration issue can each require a different solution.
In this guide, you’ll learn how to troubleshoot invoice-sending problems in QuickBooks Online and QuickBooks Desktop, check undelivered invoices, deal with PDF and printing issues, and prevent the same problem from interrupting your billing workflow again.
Why Are You Unable to Send Invoices in QuickBooks?
Before changing settings or repairing QuickBooks, take a moment to identify what happens when you try to send the invoice. This simple check can prevent you from spending time on the wrong solution.
Common causes include:
- The customer’s email address is incorrect or outdated.
- The invoice email was rejected or could not reach the recipient.
- Your email or company contact information needs attention.
- QuickBooks Online is behaving incorrectly because of a browser session or extension.
- An invoice attachment or PDF is causing a delivery problem.
- Gmail or another email service needs to be reauthorized.
- QuickBooks Desktop is not properly connected to Outlook or webmail.
- PDF or printing components are not working correctly in QuickBooks Desktop.
- Firewall or security software is interfering with the application.
- A QuickBooks Desktop installation or company-file problem is affecting the process.
The important point is that “unable to send” does not always mean the same thing. If QuickBooks shows an undelivered status, for example, you should investigate delivery rather than immediately repairing the software.
How Can You Check Whether a QuickBooks Invoice Was Sent or Undelivered?
Before trying different fixes, first check the invoice status in QuickBooks Online. This tells you whether the invoice was sent, remains unsent, or was marked as undelivered. Once you know the status, you can focus on the right solution instead of changing settings unnecessarily.
Step 1: Check the Invoice Status
- Sign in to QuickBooks Online.
- Go to Sales and select Invoices.
- Find the invoice your customer says they did not receive.
- Check the invoice’s current status.
- Use the status to determine your next step.
For example, if the invoice is marked Sent, check the customer’s inbox and spam folder. If it is marked Undelivered, review the delivery error and customer email address.
| Status | What to check next |
| Not sent | Invoice details and sending process |
| Sent | Customer’s inbox and email filters |
| Undelivered | Email address and delivery error |
| Invoice won’t load | Browser or invoice issue |
| Preview looks incorrect | Invoice template or PDF settings |
Keep in mind that a Sent status does not necessarily mean the customer has opened or seen the email. Their email provider may still filter or quarantine the message.
Step 2: Review the Delivery Error
If QuickBooks marks the invoice as Undelivered:
- Open the invoice.
- Review the delivery error.
- Check what caused the failure.
- Fix the issue and resend the invoice.
The error may point to an incorrect email address or a problem with the recipient’s email server.
Step 3: Check the Customer’s Email Address
An incorrect email address is one of the first things you should rule out when an invoice is not received.
- Go to Sales.
- Open your customer list.
- Select the customer who did not receive the invoice.
- Choose Edit.
- Review the email address carefully.
- Correct any spelling or formatting errors.
- Save the updated customer information.
- Resend the invoice.
Pay particular attention to missing characters, incorrect domains, and old business email addresses.
Step 4: Check for Multiple Recipients
If the invoice was sent to several people, verify each email address separately. One recipient may receive the invoice while another does not.
Step 5: Ask the Customer to Check Spam or Junk
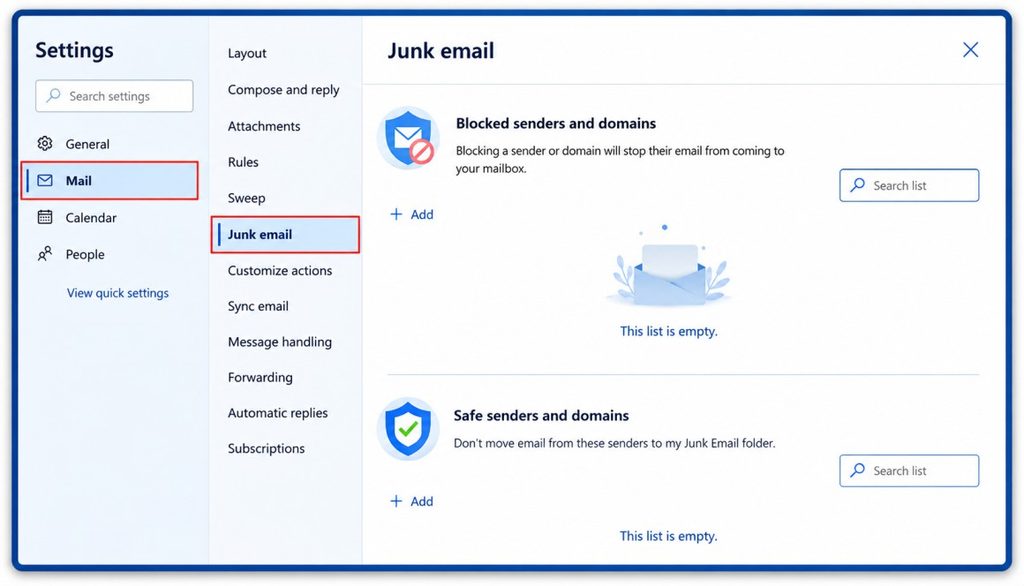
If QuickBooks shows Sent but the customer cannot find the invoice, ask them to check their Spam or Junk folder. They should also search their mailbox for the invoice email and mark it as legitimate if it was filtered incorrectly.
How Do You Fix QuickBooks Online Invoices That Are Not Sending?
If you use QuickBooks Online, start with the customer information and the browser environment. These checks are relatively simple and can tell you whether the problem is specific to one invoice or affects your entire QuickBooks session.
1. Verify Customer Email
Check the email address saved for the customer before changing any advanced settings.
Look carefully for:
- Spelling mistakes
- Missing characters
- Incorrect domains
- Old employee addresses
- Extra spaces
- Shared inboxes that are no longer active
QuickBooks specifically recommends making sure the correct email address is associated with each customer account when troubleshooting undelivered invoices.
If you find a mistake, correct the customer information and resend the invoice.
2. Check Spam or Junk
If QuickBooks shows that the invoice was sent but your customer says nothing arrived, ask them to check their:
- Spam folder
- Junk folder
- Promotions or filtered folders
- Business email quarantine
If they find the invoice there, they can mark it as legitimate according to their email provider’s controls.
If several customers suddenly stop receiving invoices, however, don’t assume every message independently went to spam. A broader delivery issue may need investigation.
3. Verify Company Email
Review the company and customer-facing email information used with your QuickBooks account.
Make sure the addresses are:
- Correct
- Complete
- Current
- Properly formatted
This is particularly worth checking if the issue began after changing business contact information or modifying your QuickBooks setup.
4. Test a Private Browser
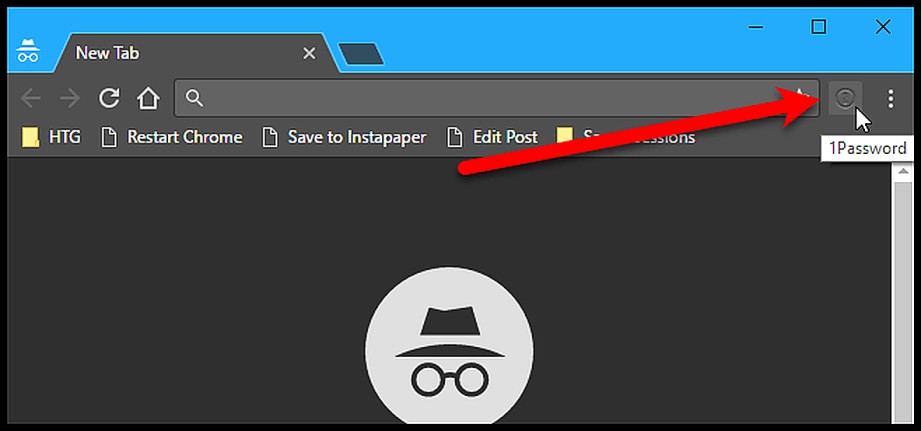
If an invoice does not load correctly, the Send option behaves strangely, or QuickBooks Online seems unresponsive, test the same workflow in a private or incognito browser window.
Try:
- Open a private or incognito window.
- Sign in to QuickBooks Online.
- Open the affected invoice.
- Try sending it again.
- If it works, return to your normal browser.
- Clear the cached browser data.
- Disable extensions that may interfere with QuickBooks.
- Test the invoice again.
You can also try another supported browser. If the problem disappears there, the issue may be related to your original browser session rather than the invoice.
5. Disable Extensions
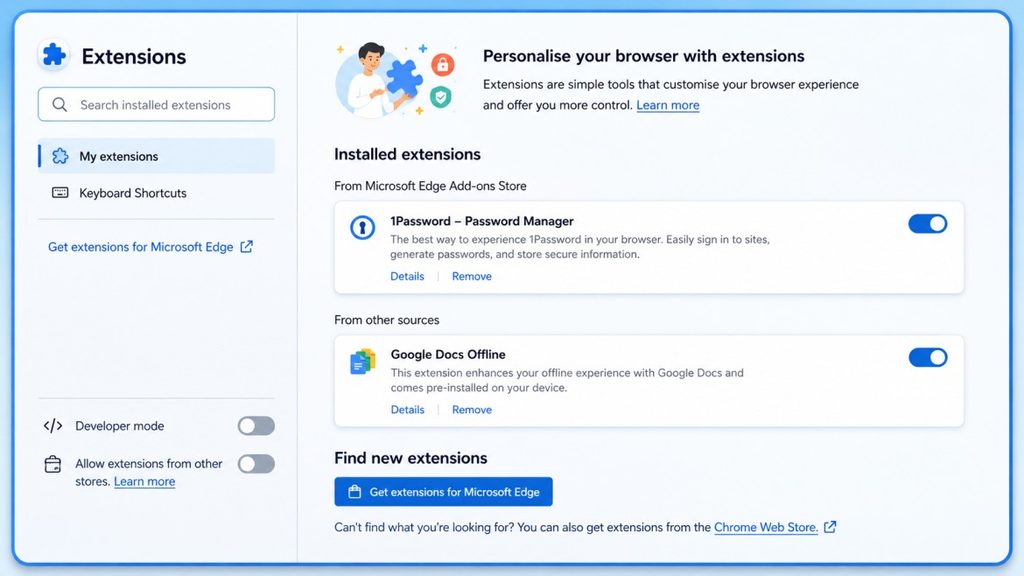
Browser extensions can sometimes interfere with web applications, particularly extensions that modify page content, block advertisements, restrict scripts, or apply additional privacy controls.
Disable extensions temporarily and test the invoice again. If sending works, enable the extensions one at a time until you identify the one causing the conflict.
There is no reason to leave every extension disabled permanently. The goal is to identify whether an extension is affecting QuickBooks.
6. Reconnect Gmail
If Gmail is connected to QuickBooks Online and invoice emails are not working, check the authorization between the two services.
QuickBooks’ current Gmail guidance explains that QuickBooks needs permission to send email through the connected Gmail account. If the connection is not working, reconnecting the account and granting the required permission can help restore sending.
Avoid relying on old advice that tells you to enable Google’s former “less secure apps” setting. That is outdated guidance and should not be treated as a current QuickBooks solution.
How Do You Fix QuickBooks Online Invoices That Are Not Sending?
If QuickBooks Online is not sending an invoice, start by checking the recipient’s email address and the invoice’s delivery status. These are the quickest ways to determine whether the problem is with the invoice recipient or with QuickBooks’ email delivery.
Work through the following fixes in order. After each change, try sending the invoice again so you can identify which step resolves the problem.
1. Verify the Customer Email Address
An incorrect or outdated customer email address is one of the first things you should check when an invoice is not being delivered.
To correct it:
- Go to All apps.
- Select Customer Hub, then Customers & leads.
- Open the customer who did not receive the invoice.
- Select Edit.
- Check the customer’s email address carefully.
- Correct the address if necessary.
- Save the change.
- Open the invoice and send it again.
Check for spelling mistakes, missing characters, an incorrect domain, or an old email address. QuickBooks specifically recommends verifying the customer’s email address when an invoice is undelivered.
2. Check the Invoice’s Delivery Status
Before making additional changes, check whether QuickBooks marked the invoice as Sent or Undeliverable.
To check:
- Go to All apps.
- Select Sales & Get Paid, then Invoices.
- Find the invoice.
- Check the Status column.
If the invoice is marked Undeliverable, QuickBooks provides delivery-error information that can help identify what went wrong. You can also go to Tasks → Go to task manager → View the errors to review available delivery errors.
If the invoice shows as Sent, but your customer cannot find it, move to the next fix rather than repeatedly sending the same invoice.
3. Reconnect Gmail If You Send Invoices From Gmail
If you have connected a Gmail address to QuickBooks Online and invoice delivery is failing, reconnect the Gmail account.
QuickBooks currently allows one Gmail address to be connected for sending invoices. If you experience delivery problems, Intuit recommends removing the connected Gmail address and adding it again. During the connection process, make sure you grant QuickBooks the required permission by selecting Allow.
To reconnect Gmail:
- Open the invoice you want to send.
- Select Review and send.
- Open the From dropdown.
- Remove the connected Gmail address.
- Select Add Gmail address.
- Choose Connect Google account.
- Sign in to your Google account.
- Select Allow when prompted.
- Return to the invoice.
- Send the invoice again.
If the Gmail connection was the cause of the problem, reauthorizing it should restore the connection used to send invoices.
Also, don’t follow old troubleshooting instructions telling you to enable Google’s “Less secure apps” option. That is not a current Gmail solution and should not be recommended for fixing QuickBooks invoice delivery.
4. Try the Default QuickBooks Email Address
If you are using a connected Gmail address and the invoice still won’t send, switch the From address back to the default QuickBooks email address and test the invoice again.
QuickBooks supports sending invoices from either the default QuickBooks email address or a connected Gmail address.
If the invoice sends successfully using the default QuickBooks address, the problem is more likely related to the Gmail connection rather than the invoice itself.
5. Use a Private Browser to Test QuickBooks Online
If the invoice does not open correctly, the Send option does not respond, or QuickBooks Online behaves unexpectedly, test the same process in a private or incognito browser window.
This is a diagnostic step rather than a QuickBooks-specific repair. If the invoice works normally in a private window, your regular browser session may be contributing to the problem.
If that happens, clear your browser’s cached data and temporarily disable extensions before testing the invoice again.
6. Disable Browser Extensions
If the invoice works in a private browser but not in your normal browser, temporarily disable browser extensions and test again.
Extensions that modify webpages, block content, or apply additional privacy controls can sometimes interfere with web applications.
Disable the extensions, refresh QuickBooks Online, and try sending the invoice again. If the problem disappears, enable the extensions individually to identify the one causing the conflict.
How Do You Resolve an Undelivered Invoice in QuickBooks Online?
An invoice that is undelivered requires a slightly different approach from an invoice that never gets to the sending stage.
If QuickBooks reports a delivery problem, concentrate on the message, recipient, attachments, and email configuration.
1. Check Error Details
Start by reviewing the delivery information available for the affected invoice.
Look for a specific error rather than relying only on the word “Undeliverable.” The more specific the error, the easier it is to determine whether the problem is related to the recipient, email configuration, or the invoice itself.
If the same error appears for several customers, treat that as an important clue. It may indicate a broader delivery problem rather than several unrelated customer-data errors.
2. Review Attachments
Attachments deserve special attention when QuickBooks reports a delivery-server problem.
Intuit’s current guidance for the Delivery Server Down error says that invoice or sales-form attachments can be involved. It also recommends checking company and customer-facing email addresses, invoice formatting, sales-form email options, and PDF/browser settings.
If you normally attach another document to the invoice, test the invoice without the attachment. If it sends successfully, investigate the attachment rather than changing unrelated QuickBooks settings.
3. Check Email Server Restrictions
If the customer address is correct but messages continue to bounce, the recipient’s mail server may be rejecting or filtering the email.
Intuit recommends checking the relevant mail-server configuration when QuickBooks Online messages are being blocked.
This is normally something for your email administrator or IT provider to investigate. Avoid adding random IP addresses or mail-server settings from outdated third-party articles.
How Do You Fix Invoice Sending Problems in QuickBooks Desktop?
QuickBooks Desktop uses a different email environment from QuickBooks Online. Depending on your configuration, it can work with Outlook or webmail, so the troubleshooting steps need to match the option you actually use.
Intuit’s current QuickBooks Desktop documentation confirms that transactions such as invoices can be sent through Outlook or webmail.
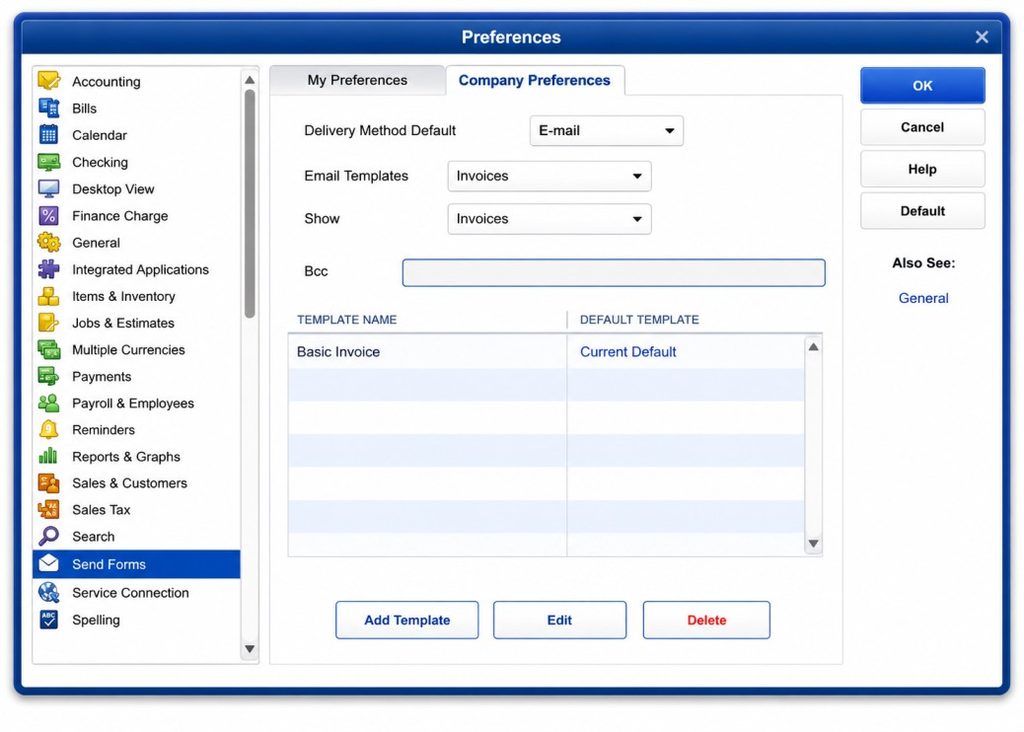
1. Check Email Preferences
Start by reviewing the email preferences in QuickBooks Desktop.
- Open QuickBooks Desktop.
- Select Edit.
- Choose Preferences.
- Select Send Forms.
- Under My Preferences, review the email option currently selected.
- Confirm that the account information is correct.
If you recently changed your email address, password, Outlook profile, or webmail settings, this is especially important. An outdated configuration can prevent QuickBooks from connecting to your email service.
After making any necessary changes, save the settings and try sending the invoice again.
2. Check Outlook Integration
If you use Outlook, make sure Outlook itself is working normally on the same computer.
Check that:
- Outlook opens without errors.
- The correct email profile is available.
- Your email account is active.
- You can send a normal email from Outlook.
- QuickBooks is configured to use Outlook.
QuickBooks’ current setup guidance includes Outlook configuration through Edit → Preferences → Send Forms.
If Outlook cannot send an ordinary email, fix that issue first. QuickBooks will not be able to reliably use a malfunctioning Outlook setup.
3. Check Webmail Settings
If you use webmail instead of Outlook, verify the server and port information with your email provider. Intuit notes that webmail providers may require two-step verification and that you should obtain the appropriate server information from your internet or email provider.
Do not copy SMTP settings from an old tutorial simply because they appear to match your provider. Email authentication requirements can change.
4. Update QuickBooks Desktop
If your QuickBooks Desktop installation is behind on supported updates, check for available updates before performing more invasive repairs.
After updating, restart QuickBooks and test the same invoice again. This is a useful diagnostic step because you can determine whether the issue is related to the software environment before moving into repairs.
How Do You Fix QuickBooks Desktop PDF and Printing Problems?
Sometimes the email itself is not the real problem. QuickBooks Desktop may have trouble creating the PDF that needs to be printed or attached to the email.
This can explain why QuickBooks invoices are not printing correctly and why invoice emailing can fail at the same time.
1. Run Print and PDF Repair
QuickBooks Tool Hub includes a QuickBooks Print & PDF Repair Tool for supported PDF and printing problems.
A practical workflow is:
- Close QuickBooks Desktop.
- Open the current QuickBooks Tool Hub.
- Select Program Problems.
- Select QuickBooks Print & PDF Repair Tool.
- Allow the repair to finish.
- Reopen QuickBooks.
- Test the invoice again.
Intuit currently recommends the Print & PDF Repair Tool for QuickBooks Desktop PDF and print problems.
Use the current Tool Hub provided by Intuit rather than downloading an unofficial copy from another website.
2. Check Invoice Preview
Before troubleshooting your physical printer, preview the invoice.
If the preview itself is incorrect, investigate the invoice design or template.
If the preview is correct but the printed page is not, the problem may be related to the printer, driver, paper size, scaling, or Windows print settings.
This simple distinction can save you from changing QuickBooks invoice settings when the real issue is the printer.
3. Check Printer Settings
If the invoice looks correct on screen but prints incorrectly, review:
- Printer selection
- Paper size
- Page orientation
- Scaling
- Printer driver
- Windows print preferences
If other documents also print incorrectly, the printer environment deserves attention before you make changes inside QuickBooks.
What Should You Do If QuickBooks Still Cannot Send Invoices?
If the basic checks do not solve the problem, move to advanced troubleshooting. At this point, you should have enough information to know whether the issue is specific to one invoice, one computer, or your broader QuickBooks environment.
a. Run QuickBooks Tool Hub
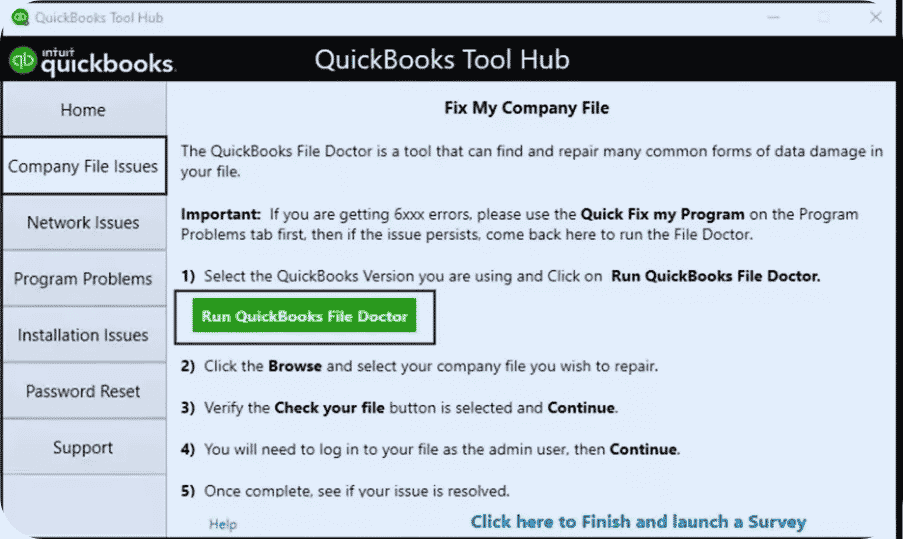
For QuickBooks Desktop, the Tool Hub provides several troubleshooting utilities for common program, installation, company-file, PDF, and printing problems.
Use the tool that matches the problem rather than running every available diagnostic simply because it is there.
b. Repair QuickBooks
If QuickBooks Desktop behaves incorrectly across multiple features, a program repair may be appropriate.
Before making installation changes, make sure your company data is protected and that you understand the repair process for your particular QuickBooks Desktop version.
A repair should be considered after simpler email, PDF, printing, and configuration checks have been exhausted.
c. Check Company File
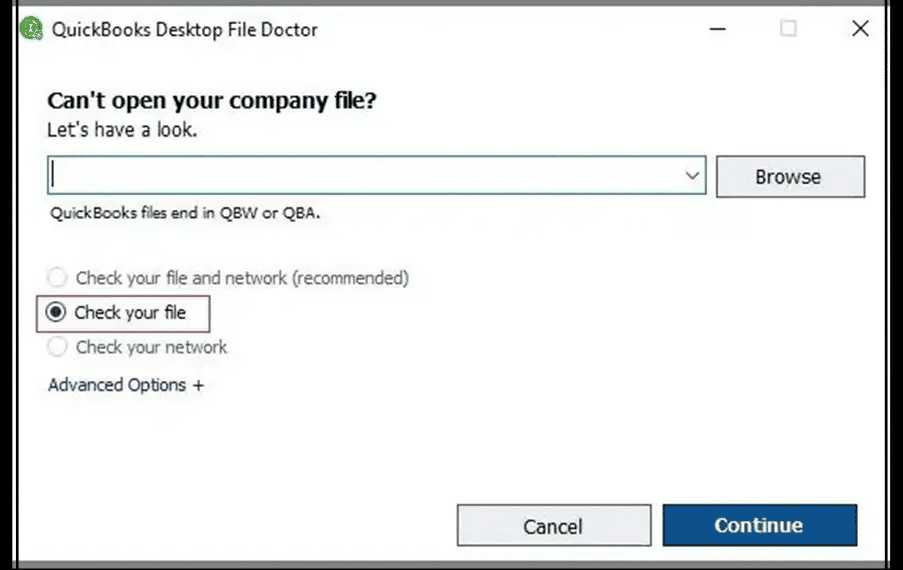
A company-file problem becomes more likely if invoice issues occur alongside other unusual QuickBooks Desktop behavior.
For example, you may notice:
- Other transactions fail to open.
- Reports behave unexpectedly.
- QuickBooks freezes or becomes unresponsive.
- Multiple unrelated features stop working.
- Several users experience similar problems.
If only one invoice cannot be emailed while everything else works normally, don’t immediately assume that the company file is damaged.
d. Review Firewall Settings
If security software is blocking QuickBooks, check its logs or blocked-application history first.
If you confirm that QuickBooks is being blocked, work with your IT administrator or security-software provider to create an appropriate exception.
Avoid leaving antivirus or firewall protection disabled simply because invoice sending works while it is turned off. A temporary test can identify the cause, but the long-term solution should maintain appropriate security.
How Can You Prevent QuickBooks Invoice Sending Problems?
Once your invoices are sending normally again, it is worth making a few small changes to reduce the chance of another interruption.
- Keep Customer Details Updated: Customer email addresses change over time. Make it part of your normal billing process to verify important customer contact information when changes are reported.
- Test Automated Invoices: If you use recurring invoices, review the template and schedule periodically. QuickBooks Online currently supports recurring invoice templates and can automate appropriate invoice workflows. The available behavior depends on the recurring transaction type and your QuickBooks setup. Don’t assume that an automated invoice will always be correct simply because it worked last month. Review recurring templates when prices, services, payment terms, or customer details change.
- Keep QuickBooks Updated: For QuickBooks Desktop, keep the software on a supported release and install appropriate updates. For QuickBooks Online, updates are handled differently because the service is web-based. Keeping your browser current is still important for a stable experience.
- Maintain Browser and Email Settings: For QuickBooks Online, keep your browser updated and periodically review extensions that interact with web pages. For Desktop, keep Outlook or your selected webmail configuration current and make sure your email credentials and authentication requirements are up to date.
How Do You Create and Manage Invoices in QuickBooks?
Fixing an invoice problem is only part of maintaining a reliable billing process. You also want to make sure invoices are created correctly before they are sent. QuickBooks Online’s current invoice workflow lets you create an invoice, select the customer, review the invoice and due dates, add products or services, configure payment and scheduling options, and then send the invoice or save it for later.
- Create an Invoice: To create an invoice in QuickBooks Online:
- Select + Create.
- Select Invoice.
- Choose the customer.
- Review the customer’s information, especially the email address.
- Check the invoice date, due date, and payment terms.
- Add the products or services.
- Review quantities, rates, taxes, and totals as applicable.
- Review the invoice before sending.
- Select Review and send to email it immediately, or save it for later.
The exact options available can vary by QuickBooks Online plan and experience.
- Customize an Invoice: QuickBooks Online provides invoice customization options that can help you present your business information consistently. Depending on your plan and current QuickBooks experience, you can customize aspects of your sales forms and invoice design. Intuit’s current documentation also notes that invoice customization is available through the invoice management controls. Keep the design practical. Your customer should be able to identify the seller, charges, amount due, due date, and payment information without searching through unnecessary visual elements.
- Set Up Automatic Invoices: If you bill the same customer on a predictable schedule, recurring invoices can save time. QuickBooks Online currently allows recurring transaction templates to be created as Scheduled, Reminder, or Unscheduled transactions. For appropriate recurring invoice workflows, you can choose scheduling and email options. Keep an important distinction in mind: automation does not mean you should never review the resulting transactions. QuickBooks’ current recurring-transaction guidance notes that recurring invoice templates are saved as drafts that need to be reviewed and finalized in the applicable workflow.
- Reset Invoice Numbers: If you want to change your invoice numbering, first decide whether you actually need to reset the sequence. QuickBooks Online currently provides a Custom transaction numbers option that lets you use your own numbering format. You can turn the option on under Settings → Account and settings → Sales → Sales form content, then enter a custom invoice number on the invoice. Be careful when changing numbering. Existing invoice numbers should remain identifiable, and you should avoid creating duplicate numbers simply to restart a sequence.
- Correct an Invoice Date: If an invoice date is wrong, review the date before sending the invoice.
Also check the:
- Due date
- Payment terms
- Service or transaction date
- Accounting period
Don’t change an invoice date merely to make the invoice appear newer or older. The date should reflect the underlying transaction and your accounting requirements.
Final Thoughts
When you are unable to send invoices in QuickBooks, the best approach is to diagnose the failure before changing settings.
Start with the invoice status and delivery information. Then verify the customer’s email address, check spam filtering, and test the QuickBooks Online browser environment if necessary. For QuickBooks Desktop, focus on the email method you use, Outlook or webmail configuration, PDF generation, and printing components.
It is also worth separating related problems from the main issue. An invoice that is not being delivered needs a different solution from an invoice that the customer received but cannot pay. Likewise, a printing problem does not automatically mean that your email settings are incorrect.
Once you identify the exact point where the invoicing process breaks, the solution is usually much more straightforward. A clear troubleshooting process not only helps you get the current invoice out the door but also gives you a better foundation for reliable, repeatable billing in the future.
Frequently Asked Questions
QuickBooks may stop emailing invoices due to incorrect email settings, login authentication problems, or issues with your email provider. To fix this:
1. Verify customer and company email addresses
2. Check if your email provider requires updated passwords or app-specific passwords
3. Clear browser cache (QuickBooks Online)
4. Reconfigure your email settings in Edit > Preferences > Send Forms (QuickBooks Desktop)
5. Ensure your email server isn’t blocking QuickBooks
This message appears when your Intuit account session expires.
1. Sign back into your Intuit ID
2. Go to Company > My Company, then sign in again
3. Ensure your system clock is accurate (Incorrect time can cause sign-out issues)
4. Update QuickBooks to the latest version
This issue often relates to damaged PDF components, printer drivers, or email configuration errors.
1. Run QuickBooks Tool Hub > PDF & Print Repair Tool
2. Ensure your printer is set as default
3. Update QuickBooks and Adobe Reader
4. Restart your computer and try again
5. Repair QuickBooks installation if the error persists
Windows 11 may block certain QuickBooks components or require updated permissions.
1. Run QuickBooks as administrator
2. Allow QuickBooks through Windows Firewall
3. Update Windows 11 and QuickBooks
4. Use QuickBooks Tool Hub to repair program files
5. Reconfigure your email settings in QuickBooks
This issue occurs when Outlook is not set as the default email app or integration is broken.
1. Set Outlook as the default program in Windows
2. Update both Outlook and QuickBooks
3. Repair Microsoft Office
4. Re-enter email credentials in Preferences > Send Forms
5. Ensure Outlook is closed before sending emails from QuickBooks Desktop
Gmail frequently blocks third-party apps like QuickBooks unless settings are updated.
1. Enable IMAP in Gmail
2. Use an App Password if 2-step verification is enabled
3. In Gmail security settings, allow access for connected apps
4. Update Gmail credentials inside QuickBooks
5. Check the Gmail spam folder for blocked messages
This error indicates that QuickBooks cannot communicate with your email server.
1. Check your internet connection
2. Disable VPNs or firewalls temporarily
3. Add QuickBooks as an allowed program in your firewall
4. Verify that your email provider’s outgoing server (SMTP) is correctly configured
5. Restart your router and computer
This error typically relates to damaged Microsoft components or QuickBooks files.
1. Run Quick Fix My Program in QuickBooks Tool Hub
2. Repair Microsoft .NET Framework
3. Repair QuickBooks installation
4. Reinstall the QuickBooks PDF converter
5. Ensure Windows 11 updates are fully installed